I've posted a couple lessons on blending, at this point our painting has some cool looking colors, but no definition and it doesn't "pop" With a little help from black and white Postermans that's about to change.
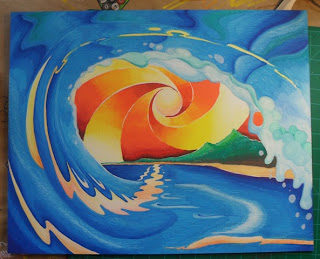 |
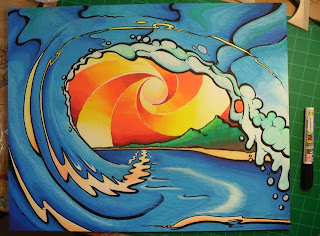
| Colors done, now for the outlines! |
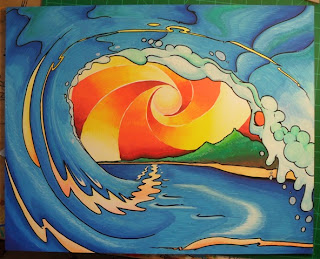 |
I first trace everything I want outlined with a fine point Posterman Pen. At this point there's a little more definition but all the lines are the same width so there's no depth or "umph"
A tip on outlining, especially for large curves: I use alot more more elbow and shoulder motion than wrist motion to keep smooth lines. | |
|
 |
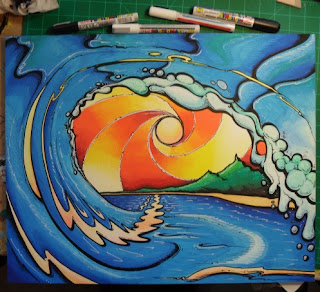
Next I go back with my fine tip, a medium tip, and a chisel tip to add thicker lines and varying widths.
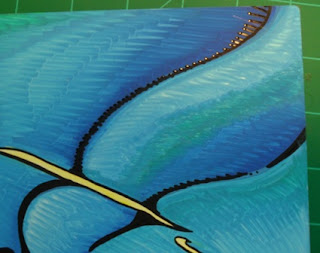
In this detail shot I added some hatching in the direction the wave is flowing to add depth and movement... |
|
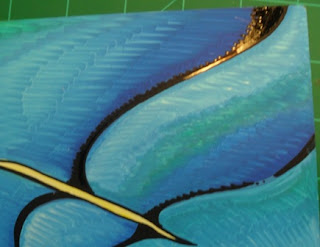 |
| ... then went back to thicken the line and clean it up. |
 |
I continue to add thickness and various line widths this helps add depth.
Notice how the waves seems to stand out from the background with the thicker lines. |
 |
| Next, I reach for the extra fine black marker and and clean up the ends of my lines and add details/shading. |
 |
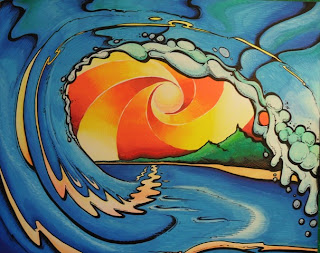
| Finally, I go back with a fine and extra fine white marker to add highlights and detail work. |
Take your time on the outlines and highlights, its what really brings everything together. Often in my paintings I'll want to abandon it halfway through because its not looking how i envisioned it, but I persevere and once I add the outlines/ details I am always happy with the outcome.
My only other tip with the detailing is you have to find a balance with making the painting look awesome and overdoing it. Its easy to keep adding little lines here and there, I could probably do it all day, but at some point I have to step back, throw up my hands and say, that's it... its done! For me I have a rule, once I add my signature its done, no more tweaks or touch ups.
Hope this has been an enlightening look into my process and helped with some paint pens tips, now get to painting!
"Laissez les bons temps rouler!"


