Monday, May 23, 2011

Painting with Paint Pens: Color Blending

 When people see my art for the first time I often hear questions like "how do you get such clean lines?" and "what kind of paint do you use?" I always receive a look of disbelief when I respond that I use paint pens, while some larger paintings are mixed media, many of my paintings and all of my skateboard and vinyl paintings are 100% paint pen. While I am not the first artist to use paint pens as their medium, I am happy to pass along tips and tricks to other artists wishing to try their hand at paint pens.

I use Zig Posterman Pens from Kuretake, they come in a variety colors and tip sizes and they blend really well! A great surface to start with is gesso board, they super light and portable, they come in a variety of sizes and there's no prep needed, just unwrap and you're ready to paint.

Here's a step by step look at the latest painting I'm working on:

I start of with a light, rough sketch. Very little detail just the basics.
This will be a sun just above the horizon as seen through the curl of a wave.

I'll start out with lighter sections of the painting, as its easier to cover up the light sections than the dark if I need to.
For the sunbeams I', going to blend from Red to Orange to Yellow to White.

Using Posterman Medium tip Pins I add a section of Red and a section of Orange.

I then use the Orange pen to pull out the red and blend the colors.
The trick to paint pens is you have to work fast as they dry quickly.


Next I add some Yellow.

Then I use the Yellow to pull out the Orange and blend the colors.
If you need you can go back with the Orange to adjust you blend.

For the next section of the blend I start with the White at the edge of the yellow and work outwards to get a gradual fade to white. For this I used a chisel tip Posteman, but a medium tip would work here as well.

I wet back with a fine tip red to the add a narrower end.
There you have your basic blend: Red to Orange to Yellow to White.
 
Working in small sections to prevent the paint from drying before I can blend it I add two more sunbeams.
For the alternate beams I will work backward with the same color blend, just starting with the red at the large end.


Near the horizon I add a thin line of purple with my chisel tip marker.

Just above that a thin line of red.
Then using short stroked I use the red to blend the two.
 
Wipe off any access purple still on the marker tip (I use the back of my left hand) and add to the red area.

Again, same technique, working my blend from dark to light. I add a section of Orange...

...and blend.

A little Yellow...

... and blend.

and finishing it off with the chisel White, I also used a fine point to get into the smaller spaces.

I don't worry about getting the lines between perfect, I will go back later and do my outline work.
Right now I'm just laying out the color

The finished sub beams and my arm, I  use it to clean the tips of my markers and to make sure the pint is flowing.
BIG TIP: NEVER press down  the tip of your paint pen to get more paint on the painting, you can't control how quickly it will flow, so have a scrap piece of wood or other material, or use your arm like me.
And the color for the sky is complete. I will lay out all of the color in the painting before I do any outline/detail work. That's the basics of blending, pretty simple. The paint pens do most of the work for you. This was a four and five color blend, but depending on the effect you want you could use a simpler or more complex blend.

Next up I'll start painting the waves using light and dark blue green and purple.

Saturday, May 7, 2011

ON DECK 6

Well the show is now underway! If your not within driving distance of The Brink Gallery  in Missoula, MT you can still check out all the great decks and get in on the bidding action at : http://www.montanaskatepark.org/

Its a chance to score some sweet skate art and help a good cause at the same time!

Monday, April 4, 2011

ON DECK VI pt 5: The Final Days

The MSA is hosting their 6th annual ON DECK skate art auction on May 21 at The Brink Gallery in Missoula, MT. My piece for this years show is shipped out, here are some of the final details that brought the deck to life:
Once the major outlines are done I go back and make some of the lines thicker to add depth, and I use an extra fine black sharpie paint pen to add details, and extra fine white sharpie paint pen for highlights.

The "suckers" were left uncolored, just the original wood showing through.

Its all about the details!

Finally I clear coated the deck with a high gloss lacquer. It was the first time I've used this for clear coat, usually I use Krylon Crystal Clear or the Valspar equivalent. I tested the lacquer on a smaller piece first. It did cause the paint to have a crackled effect in a few places, but it looks really cool on the tentacles, and the shine is sweet!

adding fishing line for hanging as well as a label and my card.

and she is packed up and on her way back to MT! This deck was a lot of fun and I hate to see her go, but I'm sure through the ON DECK auction she'll find a good home!
All the decks will be on display mid-April on http://www.montanaskatepark.org/ondeck/ stop back in and check out Skate Board art from across the country. I know I can't wait to see them all, and if you find one you like make a bid, it goes to a great cause!

Saturday, March 26, 2011

ON DECK VI pt 4: I work the Lines

My deck for the Montana Skatepark Association's On Deck VI fundraiser is nearly complete! The board has been prepped, the painting has been sketched, and the color has been laid down. Now its time to bring it all together with the outline.
The colors all laid out.


Adding the outline really begins to add definition to the painting.

Varying the thickness of the lines helps to make it POP!
 Now that the basic outline is done I will go back and add the fine line detail and shading, as well as some white highlights.

Want more info on the On Deck auction or the MSA? Go to: http://www.montanaskatepark.org/ondeck/

Friday, March 11, 2011

ON DECK VI pt 3: In Living Color

Now that the deck is sanded and the sketch has been outlined, its time to get to the good stuff THE COLOR!
I began buy coloring the tentacles. I achieved the color by using ZIG Posterman Yellow, Orange, Red, Brown and Uni Posca Orange. I faded the color from yellow and orange around the suckers  red to brown for shading.
I'm planning on leaving wood grain showing on the suckers, and coloring the rest of the board.
All arms completed. I added a little Sharpie White for highlights in a few places and a touch of Sharpie Black for some of the arms further in the background.
Next I added some Green  plantlife at the bottom using both Zig and Uni Posca Green with Zig Yellow for highlights in the foreground and Zig Blue for lowlights.
Now I went to work on the beast's head in the background combining reds, blue, brown, purple and black.
I made the water by blending Sharpie Blue to Zig Blue to Sharpie Flourescsnt Blue.
Finally I crolored the mermaid using a  combination of browns, orange, yellow, and white.
With the color all laid out, the next step is what brings it all together and really makes it pop. Its time to start adding in the black outlines and shading as well as the white highlights.

Tuesday, March 8, 2011

ON DECK VI pt 2: Its getting sketchy

more on the creation of my skate deck painting for Montana Skatepark Association’s On Deck 6


Now  that I've calmed down from my initial giddiness of receiving a fresh new deck (its the simple pleasures in life). Its time to get to work!

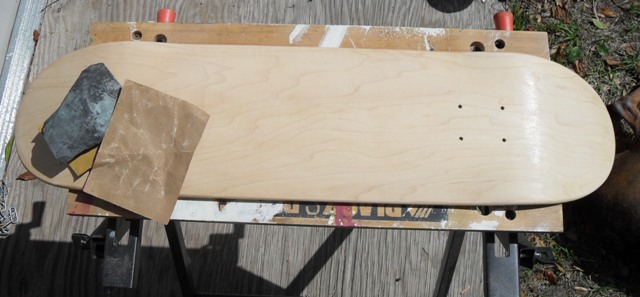
First step is to get the clear coat off the board. 
I sand down just the bottom of the deck, since that's the part I'll be painting.


I do a wet sand starting with coarse paper and working my way to finer grits until the deck is oh so smooth. This is usually the step in the process where I start figuring out what I'm going to paint. I love sanding by hand, there's something organic about the process to me, and I feel like each deck speaks to me, and tells me what kind of painting is locked inside. (not literally, I'm not that koo-koo)


Now that the deck is nice and smooth with all the clear coat gone, i take it back to my desk and get to sketchin!


First I lay out a really rough sketch, keeping it real loose. Just kind of putting the pieces in place.


I continually go back and tighten up the sketch, still keeping the whole thing really loose. I'm not too worried about detail here, that will come out in the paint. However I do want to get a solid idea in my mind of how it will look.


The final sketch
Now She's Ready for paint...


On Deck 6's online auction will go online mid-April. The opening of the show will be on First Friday in May at The Brink Gallery in Missoula, MT. - May 6 from 5-8 pm. The live auction will take place on May 21.

Learn more @ montanaskatepark.org/ondeck